Live editor
The live editor lets you work on a page while looking at your actual website. Your site is loaded next to the content fields, sections are outlined as you move over them, and what you type appears on the page as you type it.
Nothing is saved until you press Save section content, and nothing is public until you press Publish Page.
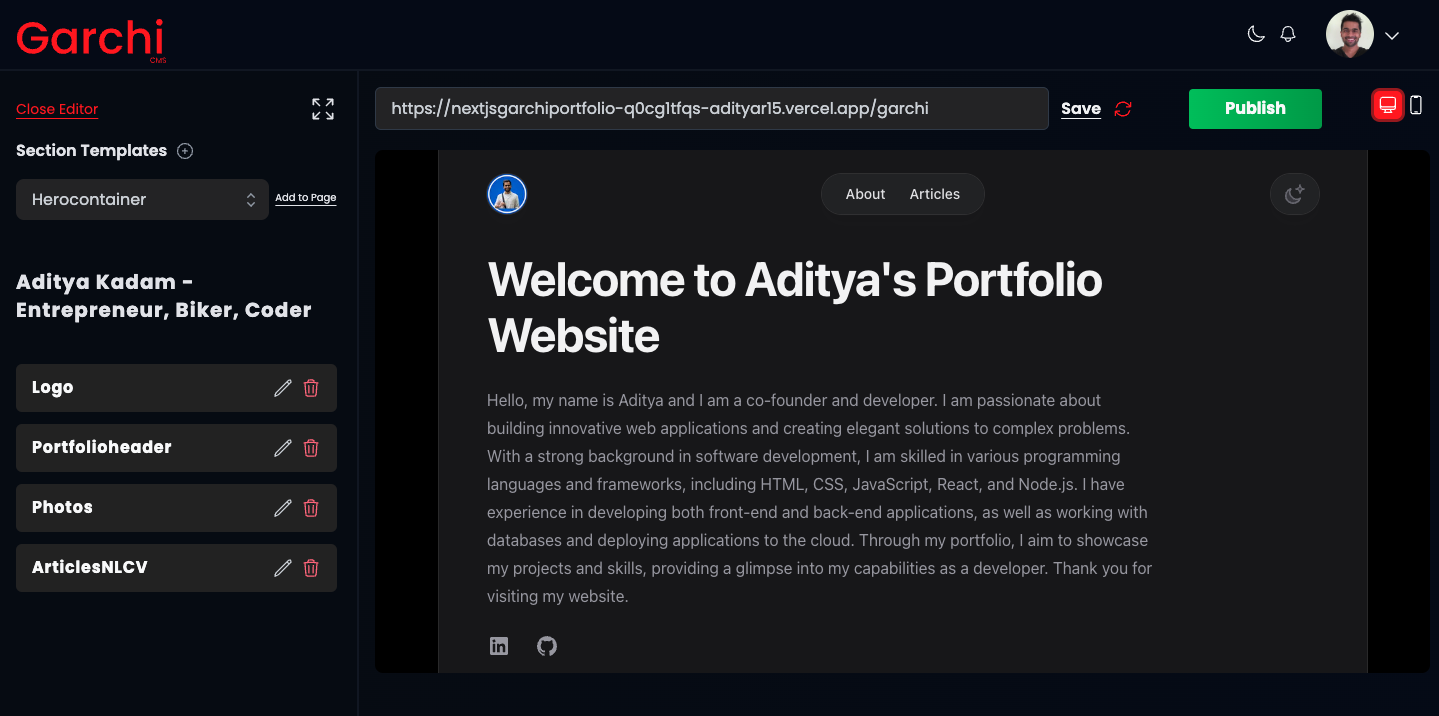
Connecting your site
1. Add the Garchi script to your pages
Add this to the layout that wraps the pages you want to edit:
<script src="https://garchi.co.uk/script/index.es.js" defer></script>
The framework guides show exactly where it goes: Next App router, Next Pages router, Nuxt, Laravel. Every starter kit already includes it.
2. Spread section props onto each component's root element
Garchi sends a few data-garchi-* attributes along with your content in section.props. They are how the editor recognises a section on the page, so they need to reach the outermost element your component renders.
// React / Next
export default function HeroContainer({ title, subheading, ...other }) {
    return (
        <section {...other}>
            <h1>{title}</h1>
            <h2>{subheading}</h2>
        </section>
    );
}
<!-- Vue / Nuxt -->
<template>
    <section v-bind="$attrs">
        <h1>{{ title }}</h1>
        <h2>{{ subheading }}</h2>
    </section>
</template>
If sections are never outlined when you hover them, this is almost always the reason.
3. Point the editor at your site
Open a page in the editor and use the address bar above the preview to set your website URL, then click Save URL. Use the address your site actually serves from — if example.com redirects to www.example.com, use the www one.
Garchi loads that URL with the Space's preview token and draft=true so you are editing against draft content. See Preview content for how to handle the preview parameters in your code.
Working on a page
Move your pointer over any section of your site in the preview. The section is outlined and a small toolbar appears above it, showing the section template's name and what you can do with it:
- Pen — opens that section's content fields in the sidebar
- Up arrow — adds a new section directly above this one
- Down arrow — adds a new section directly below this one
- Bin — deletes the section, after asking you to confirm
Nested sections have their own toolbar. Hovering a child gives you the child; move onto the parent's own area to get the parent.
If you only have read access to a Space's content, the toolbar shows the pen alone.
Editing content
- Click the pen on a section, or click the section in the sidebar list.
- Change any field. The page updates as you type.
- Click Save section content.
- Click Publish Page when you want the changes to go live.
Until you save, an Unsaved marker sits next to the save button. Moving to another section, or closing the editor, discards anything unsaved.
Adding a section
Use the up or down arrow on the toolbar, or the ⋮ menu on a row in the sidebar list, then pick a section template. The new section is created in the right position and its fields open straight away, ready to fill in.
A brand new section has no content yet, so there is nothing on the page for the editor to update while you type. Save once and it starts following along.
Deleting a section
Use the bin on the toolbar, or on the row in the sidebar. You will be asked to type delete to confirm. If you delete the section you were editing, the editor takes you back to its parent section, or to the page.
Reordering sections
Drag the rows in the sidebar list into the order you want. The preview reloads with the new order.
A note on what the live editor can show
The live editor updates your page in place, and there are limits to what it can do that way. When a change cannot be shown live, the editor tells you so on the field rather than leaving you guessing — save, and the page will show it.
The dashboard editor always works, whatever your site does. It is the fallback for anything the live preview cannot show, and the content you save there is the content your site gets.
If something is not working
"Live preview is not connected."
The script has not run in your page. Check the browser's network tab: it should be loading https://garchi.co.uk/script/index.es.js - served from Garchi rather than a copy in your own project - and getting JavaScript back. Then check the website URL saved in the editor matches the address your site actually serves from.
Sections are not outlined when I hover them.
The data-garchi-* attributes are not reaching the root element of your components. See step 2 above.
A field says it cannot be shown in the preview. Save the section. The page will render it on the next load.