Searching ...
Section
Sections allow you to add content to your page templates. A section is an instance of a section template with populated content.
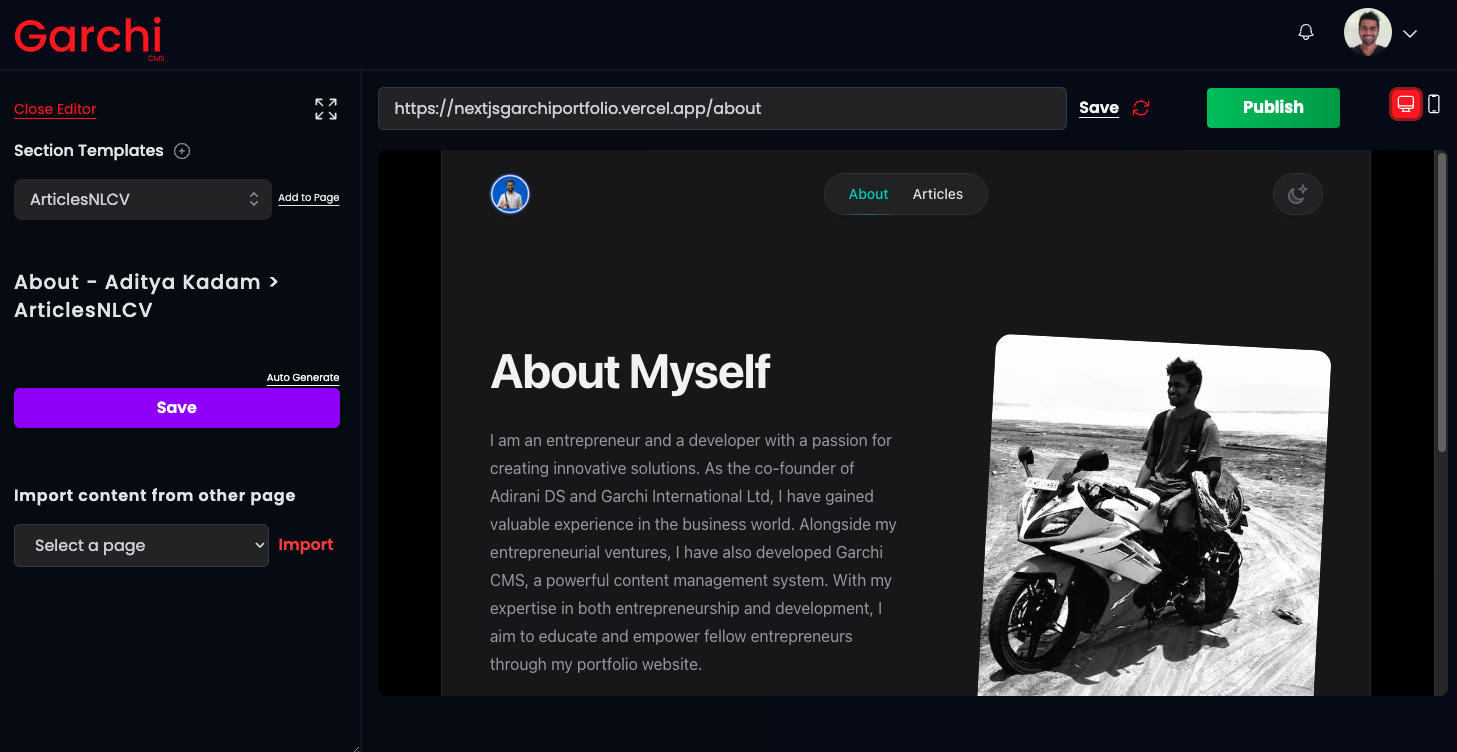
To add a section to a page:
- Go to Headless Web -> Pages and click the edit icon on the page.
- In the page editor, select a section template from the dropdown.
- Click "Add to Page".

You can rearrange sections by dragging them in the order you want.
A page can have any number of sections and each section can have nested sections (nested components). For performance reasons, we suggest nesting sections up to a maximum depth of 5. The Page API also sends nested sections up to 5 levels deep.
To add content to a section:
- Click the edit icon on the section.
- Enter values for the section template props. Props like text, headings, images etc.
- Click "Save".
- Click "Publish" when ready to go live.

Important: You must save before publishing changes.
To nest a section within another:
- Edit the parent section.
- Select a child section template and Add To Page.
- Rearrange and populate child section as needed.
Nested sections will be available in the page.sections.children array in the Page API response.
Reuse sections to avoid repeating yourself
Instead of recreating the same sections like footers, menus, etc. on every page, you can import these repeating sections to save time.
Follow these steps:
- First, create the reusable section on any page, such as the footer.
- Add that section to a new page.
- Click the edit icon for that section.
- At the bottom, click "Import content from other page" to grab the content.

This allows you to reuse sections without having to rebuild them from scratch each time. The imported section do not remain linked to the original, so if you update the original, the changes won't be propagated.
Sections can have different content across pages. For example, a "Hero" section may have unique heading, text, etc. on each page.