Searching ...
Items
Data items allow you to create reusable, dynamic content like blog posts, products, etc. to display on your site.
To begin, let's understand the flow of how a data item is created.
Each data item has one or many categories. The data item comes with a base schema which has
- Name - the item title
- Slug - used in the item url
- External URL (if the item points to 3rd party website)
- Categories - Assign to one or more categories
- One Line description
- Detailed rich text description
The base item schema also includes ecommerce fields like
- Stock
- Price
- Scratched price (for discount offers)
- SKU
You can extend the schema by adding extra details as custom key-value pairs.
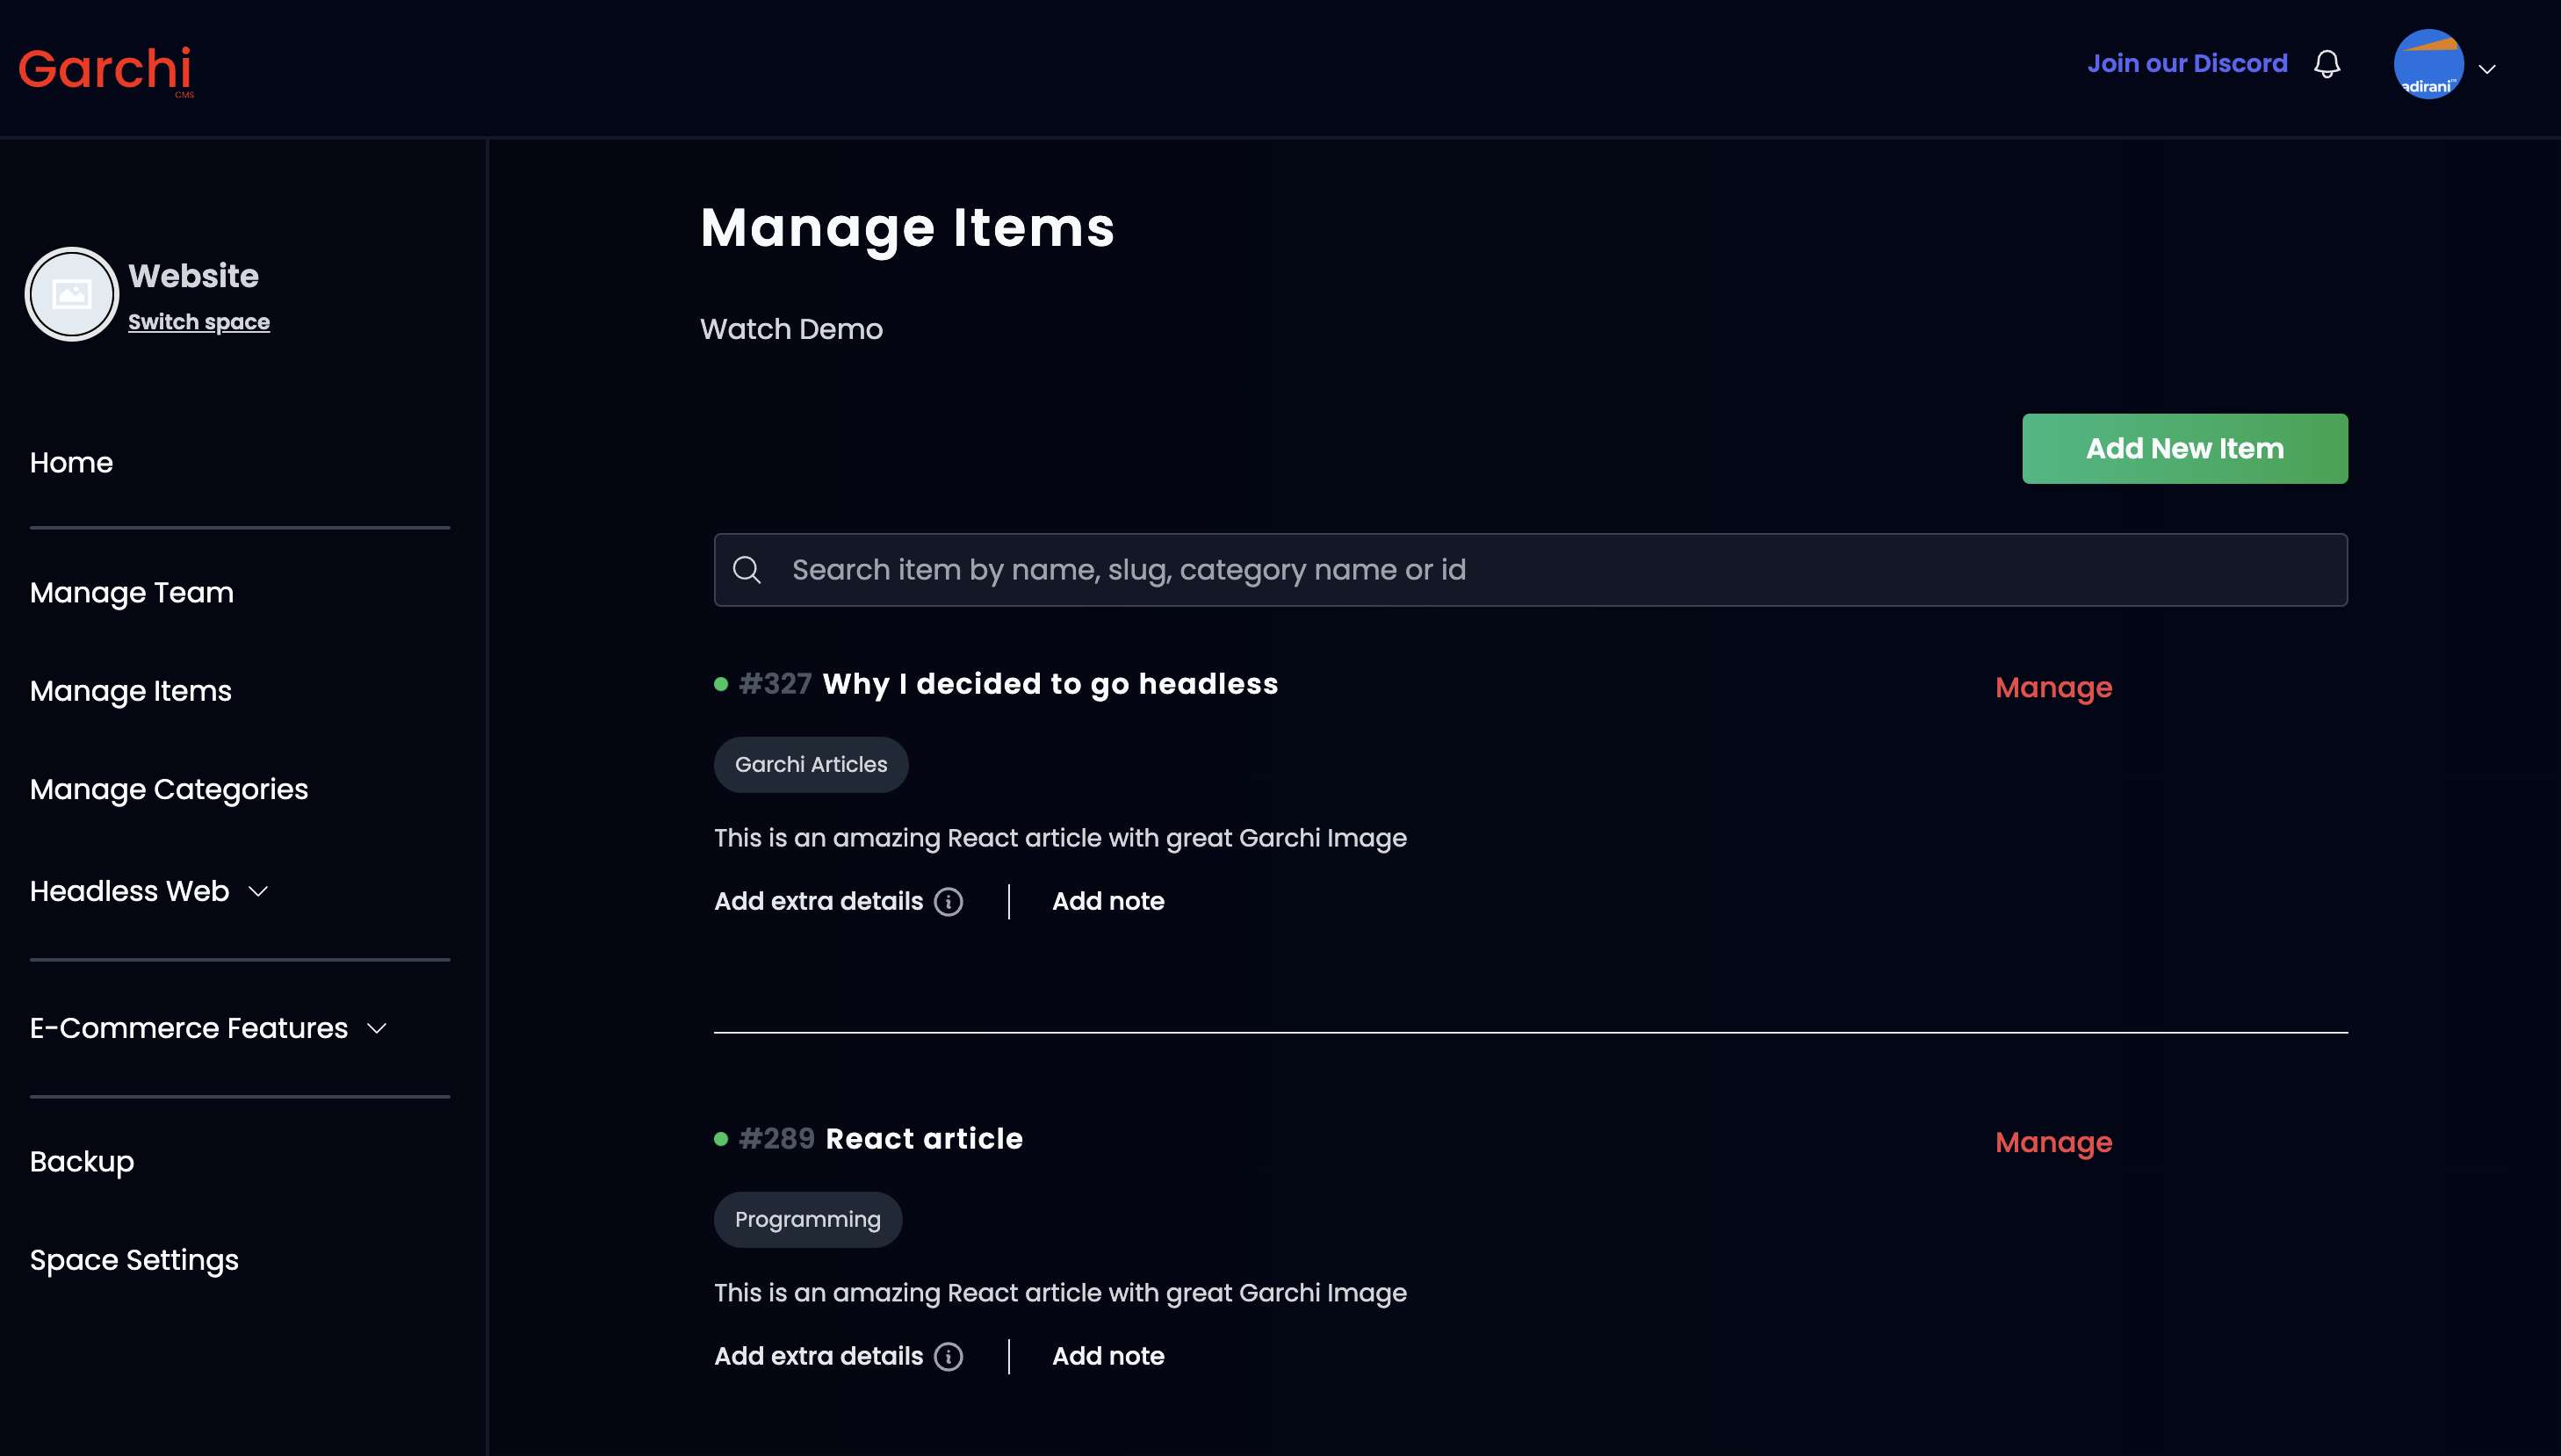
Creating an Item
To create a new item
- Go to Manage Items in the sidebar.
- Click on "Add New Item"
- Fill in the details
- You can either publish it immedietly or save as a draft or publish it at a specific time.
You can also do CRUD (create, read, update, delete) operation on an item using the API
Managing an Item
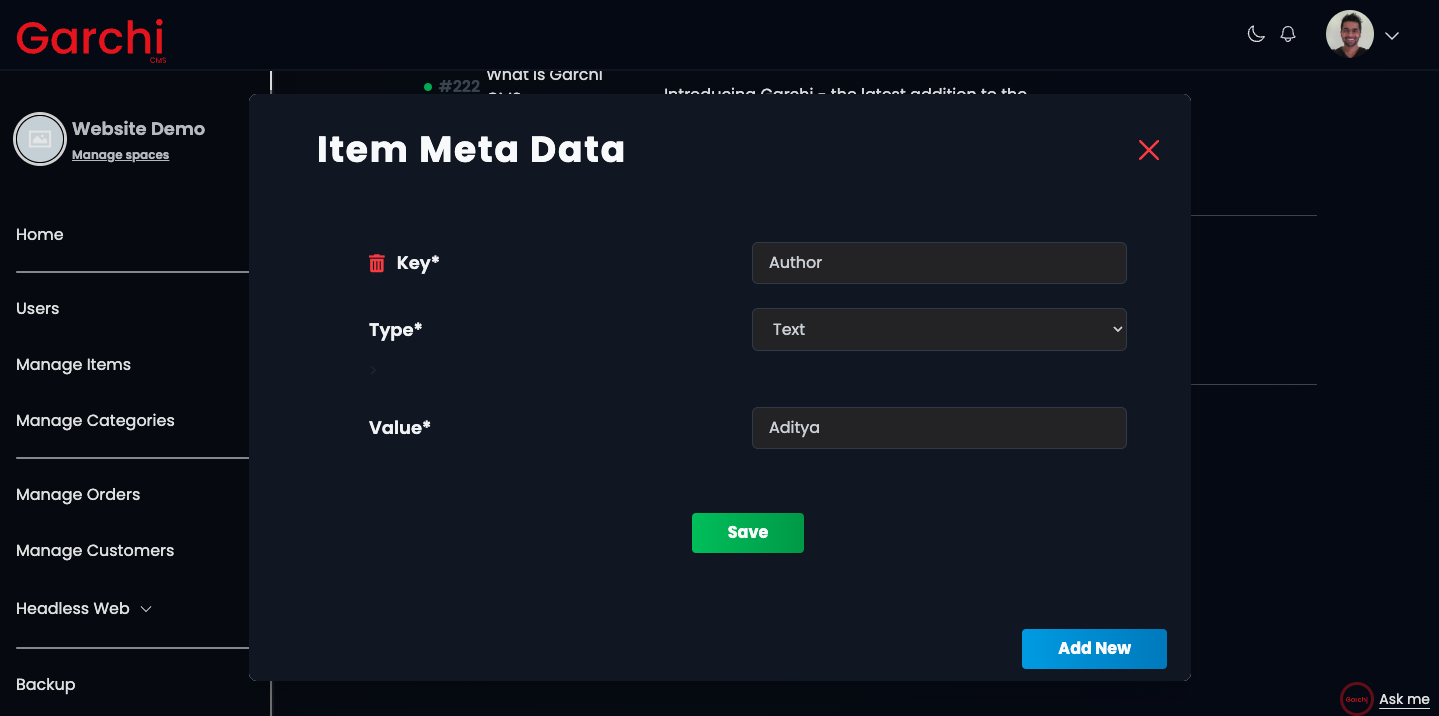
1. Extra details
Each item schema could be extended with the extra details. Each detail is a key value pair and can have a type of date, text, url, array, object, number, email and url.
For example, you can add an author field for blog posts using extra details.
To add an extra detail
- Click on Add extra details under item name.
- Enter the details.
- Click Save.
- You can add as many details as you wish by clicking on Add New.
You can also use item meta detail API for performing CRUD operation on an item's extra details.
Efficiently Accessing Item Meta
The Item API returns metadata in the item_meta array:
{
    "data": [
{
"item_id": 26,
...
 "item_meta": [
          {
              "key" : "website",
              "value": "https://adiranids.com",
              "type": "url"
          },
          {
              "key" : "linkedin",
              "value": "https://linkedin.com/adiranids",
              "type": "url"
          },
     ],
}
]
}
To get a specific meta value, you need to find it by key:
let website = item.item_meta.find(i => i.key == 'website').value
This works but can be slow for large metadata arrays. To make it efficient, flatten the metadata into an object for direct key access:
// Flatten array into object
const flattenedMeta = item.item_meta.reduce((obj, meta) => {
  obj[meta.key] = meta.value
  return obj
}, {})

// Now directly access keys
let website = flattenedMeta.website

// console.log(flattenedMeta)
//{website: "https://adiranids.com", linkedin:"https://linkedin.com/adiranids"}
The key names become properties for O(1) lookup instead of searching the array.
This preserves the original metadata structure while optimizing access.
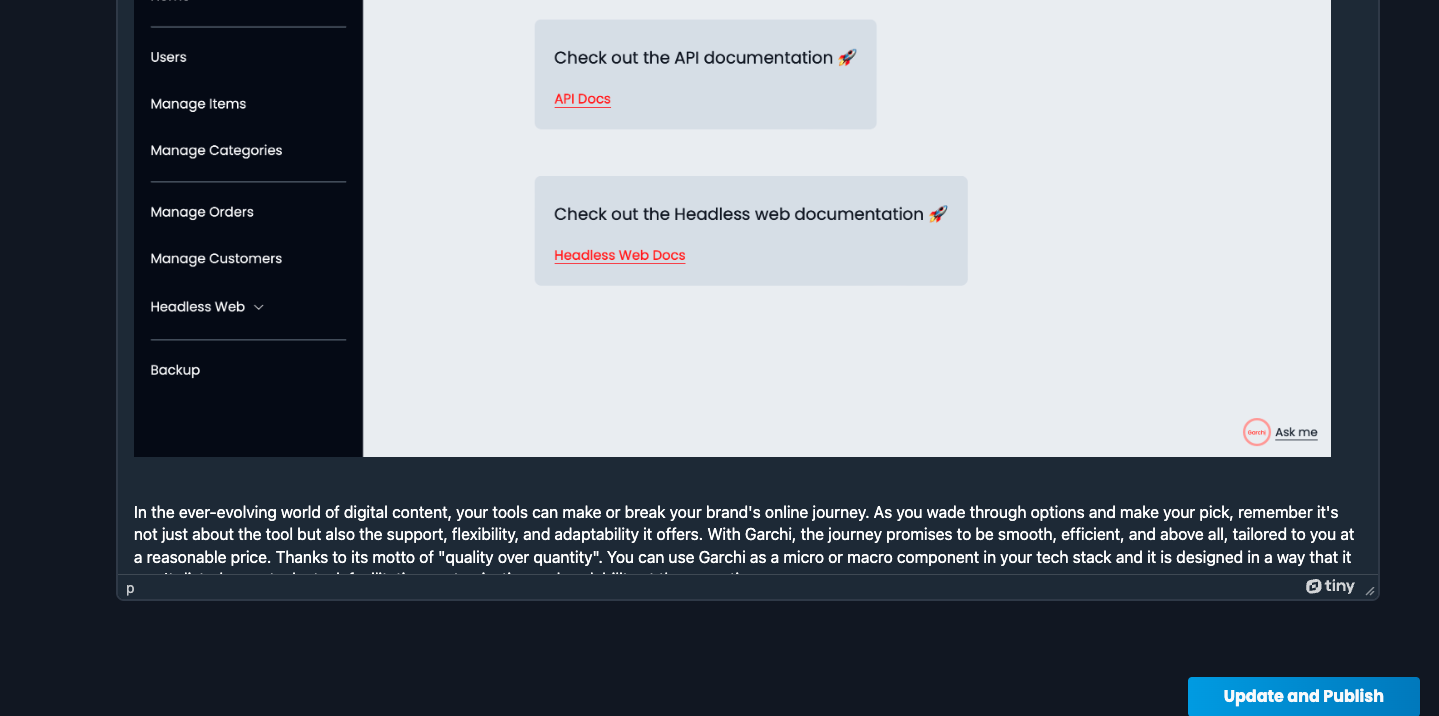
2. Edit an item
To edit an item click on Manage --> Edit Item
3. Delete an item
To delete an item click on Manage --> Delete Item
4. Duplicate an item
To clone or duplicate an item click on Manage --> Duplicate Item
5. Toggle item's feature status
Each item could be added as a featured item and then you can query it using the features api
To add an item to a feature list click on Manage --> Add to featured
To remove an item from a feature list click on Manage --> Remove from featured
6. Toggle items public status
You can set the item to draft or public mode. The API only returns those items which are published. To publish an item click on Manage --> Set as published.
This should change the red dot in front of an item to a green dot.
To set a published item to draft mode click on Manage -> Set as archive
This should change the green dot in front of an item to a red dot.
7. Manage item images
Sometimes you might want to add images to the item, for instance article featured image, product images and so on.
You can add upto 4 images per item. To add images click on Manage --> Add Images
Upload the images and click Save.
To edit an image click, hover over an image and click on Change Image. Hit Save once uploaded.
If you want to add images within a description of an item then you need to use an external cloud based image or copy & paste the image in the description section of an item.
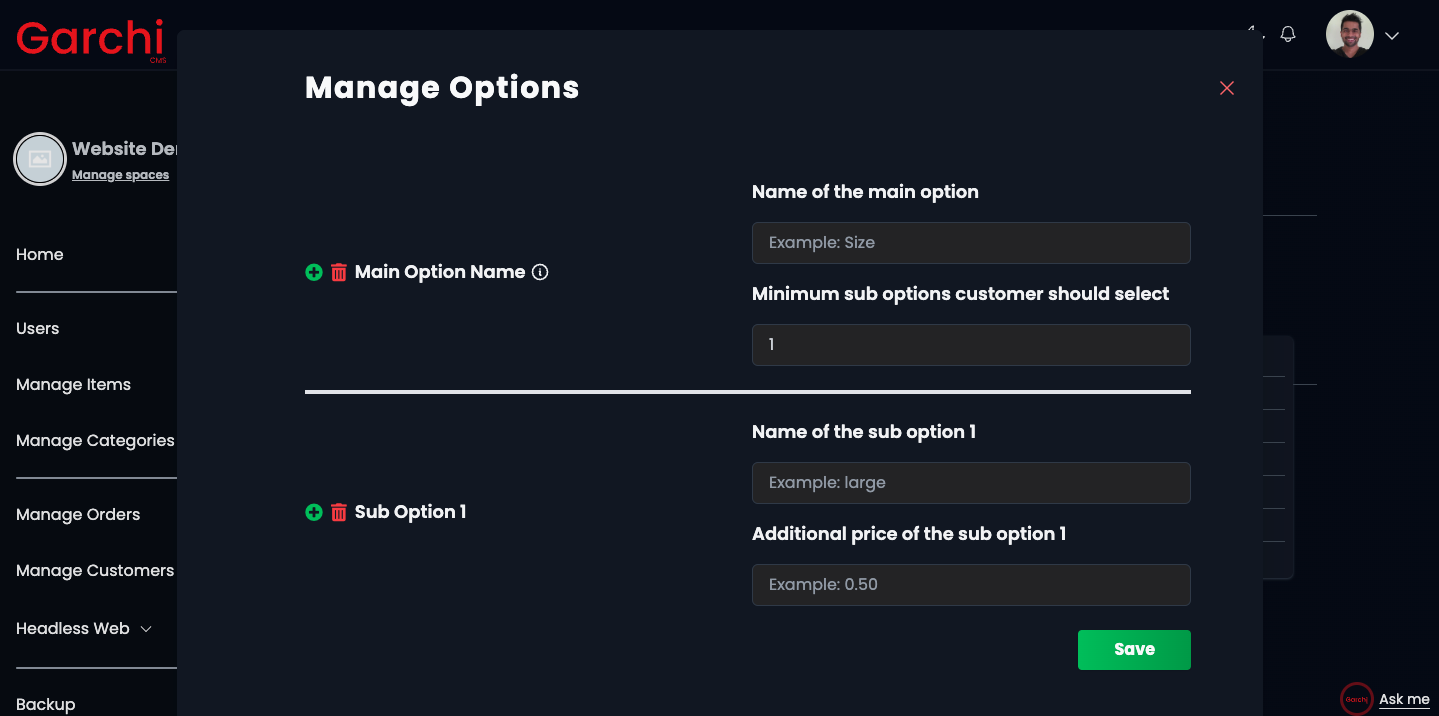
8. Item options (E-commerce only feature)
Sometimes you might have a product which has additional attributes. For example a T-Shirt might have size, colour as attributes that your user wants to choose while adding the product in the basket. For such cases we have a feature for each item to add an options tree (attribute tree).
To do so click on Manage --> Add Options
You need to start by adding a main option which has sub options under it.
In our T-Shirt example, main options could Size, Colour.
Then you need to specify for a main option how many minimum sub options user can pick. This is useful for validating on the front end to make sure that the user picks right amount of minimum options.
We can now have S,M,L,XL,XXL as sub options for Size main option. If there is any additional price involved then you can add an additional price for each sub option.
Note: Validation for things like minimum main option quantities and additional sub option pricing needs to be handled in your application code.
The item data provides the basic configuration, but your app code should validate quantities, calculate totals properly, prevent incorrect selections, etc. based on the item configuration.
For example, if a main option requires a minimum of 2 selections, your app would need to enforce that minimum quantity at the time of purchase. The item data provides the minimum quantity rule, but does not automatically enforce it.
Similarly, any conditional pricing for sub options would need to be calculated correctly in the cart/checkout process. The item data provides the pricing rules, but the totals need to be computed accurately in code.
9. Finding an item id
For some item APIs you might need to provide the item id. This is a numeric value in before the item's name after #
10. Creating vectors/embeddings for semantic search
Semantic search is a powerful mechanism to query datasets. At its core lies the vector representation of data. You can now create vector embeddings of data items and then use the semantic search API to fetch results.
How it works
-
Provide the API key:
- Visit your Dashboard --> Space Settings
- Under Third Party Secrets, select "Add New"
- Follow the steps to add your Open AI or Voyage AI API key
- We prioritize the security of your API keys and store them using industry-standard encryption methods
-
Vector Creation:
- Go to your Dashboard --> Manage Items
- Select the items you want to create vectors for
- Click on Bulk Actions --> Create embeddings
- This triggers the process of creating vector representations of your selected data items
- Check notifications (bell icon) for success/error messages
-
Indexed Storage:
- The generated embeddings are securely stored and indexed
- This ensures quick retrieval during semantic searches
Benefits of Semantic Search
- Improved Relevance: Find results based on meaning, not just exact keyword matches using the semantic search API
- Handling Synonyms: Correctly interpret queries using different words with similar meanings
- Context Understanding: Better grasp the intent behind search queries
Using Semantic Search
To perform a semantic search:
- Ensure you've created embeddings for your data items
- Use the semantic search API endpoint: